tl;dr
If you just want to see how you can use redux-form and immutable.js in react native, you can find the code for this article can be found right here.
Introduction
At Traede we use redux-form for creating forms that integrate well with redux. It is a fine library, however there are not many examples on how to make it work with React Native. So when I started playing around with React Native naturally I used redux-form for my form management and found it to be a bit difficult. Mostly because I found a bug that broke redux-form on native platform when using immutable.js. My PR has been released as of version 6.4.2. So I thought I would write a bit of documentation on how to use redux-form and immutable.js for form management based on my learnings along the way.
Agenda
The steps we will go through is...
- See how redux-form differs on native vs. web in the most simple way
- See how we can make it work using immutable.js
- A more complete example using react-native-clean-form elements
Excited? Lets go..!
Using redux-form with React Native
If you are unfamiliar with redux-form I suggest you
go read the Get Started documentation.
Note this guide assumes that you are using redux-form version >=6.4.2. Otherwise, if you
are using Immutable.js you are going to have issues with
redux-form#2336.
To create a form there are basically three steps:
- Add the redux-form reducer to your redux store
- Connect your form to the store using the
reduxFormwrapper - Connect specific fields to the store using the
Fieldwrapper
0. Create a React Native project
I am assuming you already have a React Native project ready to go. If not you can easily create one
using react-native init MyReduxFormProject.
1. Add the redux-form reducer to your redux store
For this step, please consult the redux-form documentation.
2. Connect your form to the store using the redux-form wrapper
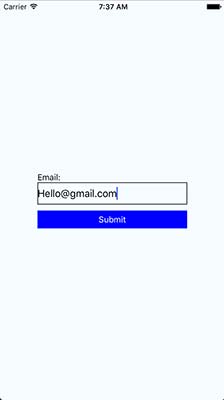
Okay, so let us start out with the simplest of forms and then connect that to redux-form. So, the code below will generate the screen on the right.
import React from 'react'
import {
  StyleSheet,
  Text,
  TextInput,
  TouchableOpacity,
  View
} from 'react-native'

const Form = props => {
  return (
    <View style={styles.container}>
      <Text>Email:</Text>
      <TextInput style={styles.input} />
      <TouchableOpacity>
        <Text style={styles.button}>Submit</Text>
      </TouchableOpacity>
    </View>
  )
}

export default Form

const styles = StyleSheet.create({
  button: {
    backgroundColor: 'blue',
    color: 'white',
    height: 30,
    lineHeight: 30,
    marginTop: 10,
    textAlign: 'center',
    width: 250
  },
  container: {

  },
  input: {
    borderColor: 'black',
    borderWidth: 1,
    height: 37,
    width: 250
  }
})
Alright, so we have our form and it already looks like a billion dollar app (unicorn alert).
Next, we need to connect the form to the redux store using the reduxForm wrapper. This is
because every key press in the form will send the value of the input field to store in the
form. When we press the submit button redux-form will extract all the saved values from
the store to a callback function we specify.
import { reduxForm } from 'redux-form'

const submit = values => {
  console.log('submitting form', values)
}

const Form = props => {
  const { handleSubmit } = props

  return (
    <View style={styles.container}>
      <Text>Email:</Text>
      <TextInput style={styles.input} />
      <TouchableOpacity onPress={handleSubmit(submit)}>
        <Text style={styles.button}>Submit</Text>
      </TouchableOpacity>
    </View>
  )
}

export default reduxForm({
  form: 'test'
})(Form)
NOTE: I left out the stylesheet declaration and the react-native imports for brevity.
Okay, so first of all we wrapped the form to connect it to the store using reduxForm.
This is basically a modified version of react-redux's connect you are probably
familiar with.
Next, we create our submit function using redux-form's handleSubmit (which
reduxForm injects into our component). The submit function is attached
to our submit button so when it is pressed the form is submitted. This is different from
web development where the submit function is attached to a form element. On
mobile platforms there is no form element so we attach it directly to the button. Or
TouchableOpacity that is...
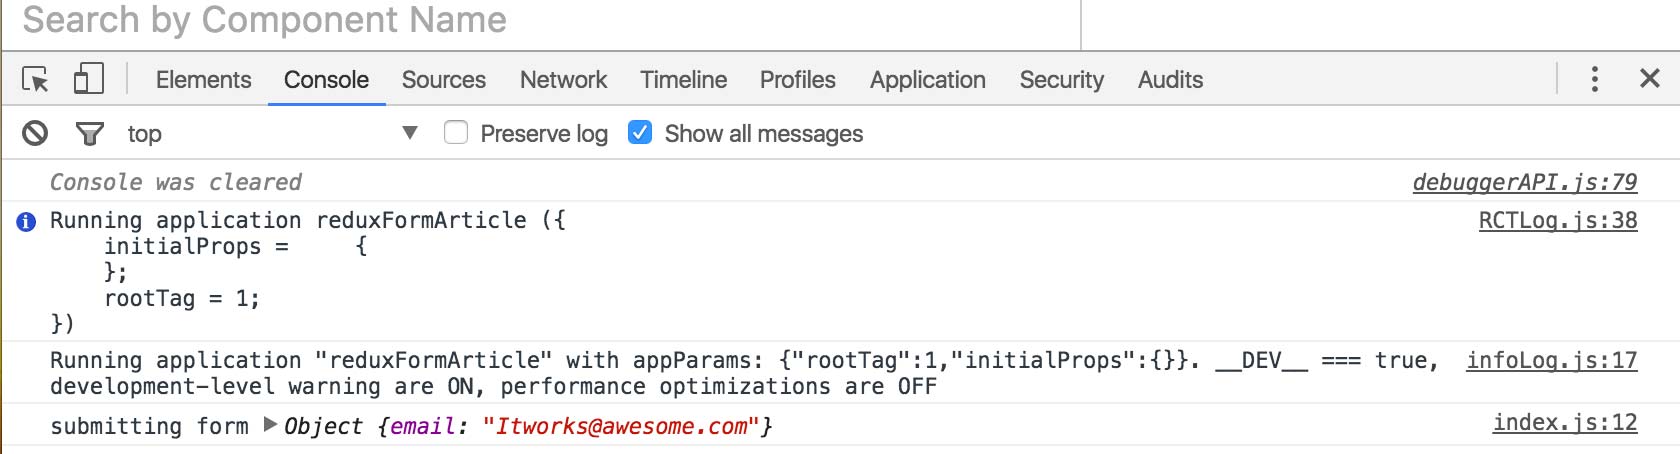
At this point try and run the code using a simulator. I also highly recommend using react-native-debugger as a debugger. You can also check out the React Native documentation on debugging for suggestions.
Either way, when you try and submit the form in the simulator you will see that our callback function provides empty values.

Yo, where my values?
3. Connect the form fields to the store using the Field wrapper
So the way redux-form works is that you have to connect each field to the store using another
wrapper named Field.
import { Field, reduxForm } from 'redux-form'

const submit = values => {
  console.log('submitting form', values)
}

const renderInput = ({ input: { onChange, ...restInput }}) => {
  return <TextInput style={styles.input} onChangeText={onChange} {...restInput} />
}

const Form = props => {
  const { handleSubmit } = props

  return (
    <View style={styles.container}>
      <Text>Email:</Text>
      <Field name="email" component={renderInput} />
      <TouchableOpacity onPress={handleSubmit(submit)}>
        <Text style={styles.button}>Submit</Text>
      </TouchableOpacity>
    </View>
  )
}

export default reduxForm({
  form: 'test'
})(Form)
Note we add the Field component and give it a name prop, much
similar to how the input field works in web development. We also add a
render function that tells reduxForm how the field should be rendered (which is
basically just a TextInput).
Now, this is where it gets tricky and what most people get wrong. So pay close attention.
In web React an input component triggers an onChange callback when the value
of the field changes. In React Native the TextInput callback is named onChangeText.
To account for this we add the change handler manually onChangeText={onChange}.
Now when we submit our form it works! Awesomesauce.
Making it work using Immutable.js
If you are trendy and using Immutable.js for your state management then you need to take some extra steps to make redux-form work. I suggest you read the official documentation on using Immutable.js with redux-form. But we will also go through the steps right here.
1. Use redux-immutablejs combineReducers and the immutable version of redux-forms reducer
Quite the mouthful. Alright, find the place where you create your redux store.
import { combineReducers } from 'redux-immutablejs'
import { reducer as form } from 'redux-form/immutable' // <--- immutable import

const reducer = combineReducers({ form })

export default reducer
Two things here: (1) you must use combineReducers from a redux-immutable
integration library such as redux-immutablejs
or redux-immutable.
The important thing here is that you import the reducer from redux-form/immutable and
NOT redux-form.
2. Use immutable version of reduxForm wrapper and Field
Okay, so this step is similar to the first one. When you wrap a form in reduxForm to connect
it to the redux store make sure you import from redux-form/immutable!
Similarly, Field must also be imported from there!
import { Field, reduxForm } from 'redux-form/immutable' // <---- LOOK HERE

const submit = values => {
  console.log('submitting form', values.toJS()) <--- use toJS() to cast to plain object
}

const renderInput = ({ input: { onChange, ...restInput }}) => {
  return <TextInput style={styles.input} onChangeText={onChange} {...restInput} />
}

const Form = props => {
  const { handleSubmit } = props

  return (
    <View style={styles.container}>
      <Text>Email:</Text>
      <Field name="email" component={renderInput} />
      <TouchableOpacity onPress={handleSubmit(submit)}>
        <Text style={styles.button}>Submit</Text>
      </TouchableOpacity>
    </View>
  )
}

export default reduxForm({
  form: 'test'
})(Form)
3. Done!
That is it! Easy no? If you use a redux-version between 6.0.3 and 6.4.2
it will NOT WORK due to a regression introduced in 6.0.3.
Make it look like a billion dollar form using styled-components
Using the absolutely awesome React styling library styled-components I have created some redux-form integrated form elements that look a little bit better than our current iteration. The look is strongly inspired by this Dribble shot by Artyom Khamitov so all credit goes to him! You can find the source code for the elements here: esbenp/react-native-clean-form.
1st step: Install react-native-clean-form
Install the form elements using npm install --save react-native-clean-form. You also need to link
the vector icon fonts to your app.
Read more about how in the README.
2nd step: Design an awesome form

Looks dope, does it not? Lets dive right into the code.
import React, { Component } from 'react'
import {
  ActionsContainer,
  Button,
  FieldsContainer,
  Fieldset,
  Form,
  FormGroup,
  Label,
  Input,
  Select,
  Switch
} from 'react-native-clean-form'

const countryOptions = [
  {label: 'Denmark', value: 'DK'},
  {label: 'Germany', value: 'DE'},
  {label: 'United State', value: 'US'}
]

const FormView = props => (
  <Form>
    <FieldsContainer>
      <Fieldset label="Contact details">
        <FormGroup>
          <Label>First name</Label>
          <Input placeholder="John" />
        </FormGroup>
        <FormGroup>
          <Label>Last name</Label>
          <Input placeholder="Doe" />
        </FormGroup>
        <FormGroup>
          <Label>Phone</Label>
          <Input placeholder="+45 88 88 88 88" />
        </FormGroup>
        <FormGroup>
          <Label>First name</Label>
          <Input placeholder="John" />
        </FormGroup>
      </Fieldset>
      <Fieldset label="Shipping details" last>
        <FormGroup>
          <Label>Address</Label>
          <Input placeholder="Hejrevej 33" />
        </FormGroup>
        <FormGroup>
          <Label>City</Label>
          <Input placeholder="Copenhagen" />
        </FormGroup>
        <FormGroup>
          <Label>ZIP Code</Label>
          <Input placeholder="2400" />
        </FormGroup>
        <FormGroup>
          <Label>Country</Label>
          <Select
              name="country"
              label="Country"
              options={countryOptions}
              placeholder="Denmark"
          />
        </FormGroup>
        <FormGroup border={false}>
          <Label>Save my details</Label>
          <Switch />
        </FormGroup>
      </Fieldset>
    </FieldsContainer>
    <ActionsContainer>
      <Button icon="md-checkmark" iconPlacement="right">Save</Button>
    </ActionsContainer>
  </Form>
)

export default FormView
If you are familiar with Twitter Bootstrap you can probably recognize some of the elements as react-native-clean-form
strive to have a similar syntax. Alright, to connect it to redux-form we just have to import Input,
Select and Switch from react-native-clean-form/redux-form or
react-native-clean-form/redux-form-immutable. Here the elements are already wrapped in FormGroup
and Label is added. Thereby we support validation feedback seen in the middle screenshot.
import React, { Component } from 'react'
import { reduxForm } from 'redux-form/immutable'
import {
  ActionsContainer,
  Button,
  FieldsContainer,
  Fieldset,
  Form
} from 'react-native-clean-form'
import {
  Input,
  Select,
  Switch
} from 'react-native-clean-form/redux-form-immutable'
import { View,Text } from 'react-native'

const onSubmit = (values, dispatch) => {
  return new Promise((resolve) => {
    setTimeout(() => {
      console.log(values.toJS())
      resolve()
    }, 1500)
  })
}

const countryOptions = [
  {label: 'Denmark', value: 'DK'},
  {label: 'Germany', value: 'DE'},
  {label: 'United State', value: 'US'}
]

class FormView extends Component {
  render() {
    const { handleSubmit, submitting } = this.props

    return (
      <Form>
        <FieldsContainer>
          <Fieldset label="Contact details">
            <Input name="first_name" label="First name" placeholder="John" />
            <Input name="last_name" label="Last name" placeholder="Doe" />
            <Input name="email" label="Email" placeholder="something@domain.com" />
            <Input name="telephone" label="Phone" placeholder="+45 88 88 88 88" />
          </Fieldset>
          <Fieldset label="Shipping details" last>
            <Input name="address" label="Address" placeholder="Hejrevej 33" />
            <Input name="city" label="City" placeholder="Copenhagen" />
            <Input name="zip" label="ZIP Code" placeholder="2400" />
            <Select
              name="country"
              label="Country"
              options={countryOptions}
              placeholder="Denmark"
            />
            <Switch label="Save my details" border={false} name="save_details" />
          </Fieldset>
        </FieldsContainer>
        <ActionsContainer>
          <Button icon="md-checkmark" iconPlacement="right" onPress={handleSubmit(onSubmit)} submitting={submitting}>Save</Button>
        </ActionsContainer>
      </Form>
    )
  }
}

export default reduxForm({
  form: 'Form',
  validate: values => {
    const errors = {}

    values = values.toJS()

    if (!values.first_name) {
      errors.first_name = 'First name is required.'
    }

    if (!values.last_name) {
      errors.last_name = 'Last name is required.'
    }

    if (!values.email) {
      errors.email = 'Email is required.'
    }

    return errors
  }
})(FormView)
Easy, right?! Now we have a good looking form connected to the store with validation support and async button feedback. You can check out more of the features in the repository.
Conclusion
Reach out on e-mail, twitter or the repository for this article.